As critical temperature-control equipment in industrial production, chillers that are left idle for extended periods are prone to "hidden damage" such as frozen pipes, internal corrosion, and refrigerant degradation if not properly handled. Correct storage and startup commissioning are key to ensuring equipment longevity and operational efficiency upon resumption.
I. Long-Term Shutdown: How to Store Correctly?
The core objectives of storage are to drain residual water, isolate air, and protect against moisture and dust. Storage measures vary depending on the downtime duration:
Short-term shutdown (7–15 days): Top up the circulating medium to the required level, close the inlet and outlet water valves, disconnect the power supply, and cover the unit with a dust cover.
Medium-term shutdown (1–3 months): Check and adjust the antifreeze concentration (increase the glycol ratio in winter), replace sealing gaskets to seal pipe connections, and place desiccant in the electrical cabinet.
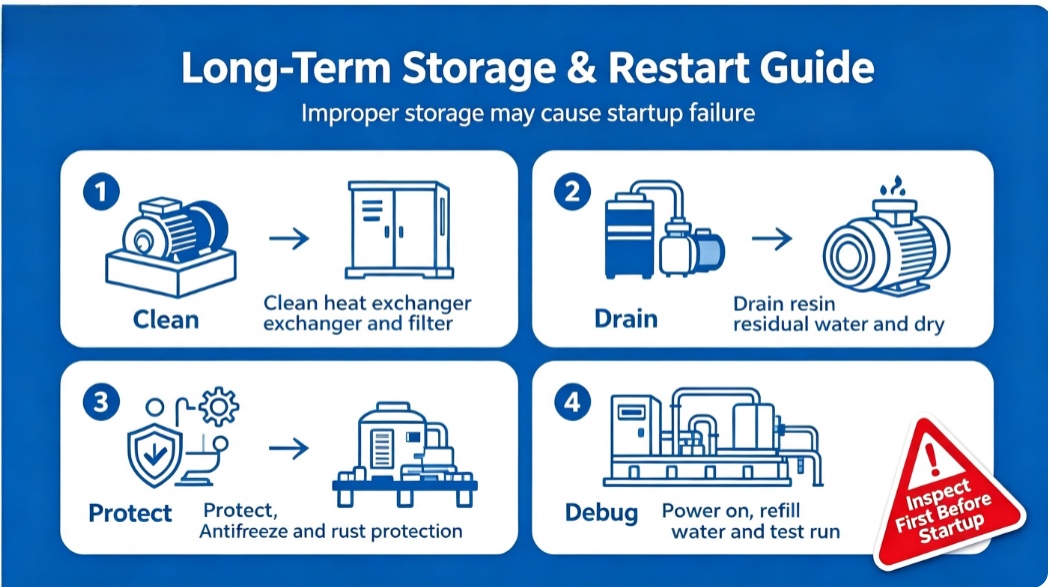
Long-term shutdown (more than 3 months): A thorough preservation procedure must be performed. The specific steps are as follows:
Step 1: Proper shutdown and draining. Never cut power directly while the chiller is under full load. Instead, run the unit unloaded for 20 minutes to balance system pressure and remove residual heat. Then open the drain port to completely empty the water tank and piping system. If antifreeze is used and intended for reuse, it can be collected in clean containers.
Step 2: Compressed air purging. Residual moisture remains after draining and must be blown out with a compressed air gun. Open all relevant ports (fill port, drain port, etc.), and blow through both the low-temperature and high-temperature outlet ports for about 80 seconds each, until no water droplets remain at the fill port. Special precautions: compressed air pressure must be kept below 0.6 MPa to avoid damaging internal piping; never blow air toward sensitive connectors with yellow labels (such as flow sensors).
Step 3: Nitrogen charging and storage. After purging, it is recommended to charge the system with dry nitrogen at approximately 0.03 MPa to create an inert gas protective layer, effectively preventing metal oxidation and corrosion. Then seal all ports with plugs, wrap the entire unit with moisture-proof and dust-proof film, raise the base 15 cm off the ground to isolate floor moisture, and disconnect the main power supply.
II. Restarting the Chiller: What Are the Commissioning Steps?
Directly powering on and operating after long-term storage carries significant risks. A proper startup commissioning procedure should follow these steps:
Step 1: Comprehensive inspection and power-on stabilization. First, verify that water and electrical systems are normal; inspect the unit's appearance, electrical wiring, and refrigeration system components for any damage or leaks. After confirmation, apply power but do not start the compressor immediately—allow the unit to remain energized for 3 hours. This is to heat the compressor crankcase oil, ensure adequate oil return, and allow dissolved refrigerant to be expelled, thereby preventing "liquid slugging" that could damage the compressor.
Step 2: Start auxiliary systems and verify parameters. After the stabilization period, start the external water pump system first to confirm normal water circulation. Then manually rotate the compressor coupling to check for any binding. Next, start the compressor and closely monitor current, pressure, temperature, and other parameters during operation. Verify control accuracy through two loading/unloading cycles. Simultaneously, inspect and calibrate control components such as pressure switches and thermostats.
Step 3: No-load running-in and loaded operation. During initial commissioning, it is advisable to run the chiller unloaded for 1 hour to verify temperature control and alarm functions. Once all parameters meet requirements, gradually connect to the production line and transition to loaded operation. If a flow alarm is triggered after restart, it is usually due to air bubbles in the piping—this can be resolved by opening the fill port to release trapped air.
III. Summary
Long-term storage of a chiller is by no means a simple power-off procedure, nor is startup merely a matter of turning it back on. For storage, the three essential steps—draining, purging, and nitrogen charging—are indispensable. For startup, the key milestones are a 3-hour power-on stabilization period and a 1-hour no-load running-in period. Following these scientific storage and commissioning procedures ensures that your chiller remains stable and reliable when brought back into production after extended idle periods.

 Get a Quote